Tuesday 27 February 2018

Axis - SoundSpot


Very cool all in one multiband compresser/imager/mastering plugin. Quite easy to get to grips with and a nice user friendly interface. Great to have all of these controls rolled into one!

 When you’re mixing or mastering music, sometimes you may find yourself in a situation where you need to manipulate the audio in a way that falls outside the realms of what a conventional plugin can do, and with this in mind SoundSpot set out to create a plugin that can solve this problem. Introducing the Axis... The Axis is a combination of two of their most popular plugins, the MSW1 & Propane with the addition of a brand new upwards and downwards compressor that is capable of dual directional compression which can be both subtle and brutal. But it doesn’t end there! We’ve made the whole unit multiband, for complete control over the incoming signal, allowing you to manipulate the audio to get punch, clarity, groove or sparkle without the need to load up a huge number of individual plugins. The Axis linear phase has been made to be lightweight, so go wild... The only limit is your imagination. Features: + Intuitive, easy to navigate user interface. + Designed to work flawlessly with touch controllers such as the Raven by Slate Media. + Multiband Layout + Individual Compressor, Imager & Metering module per band + Simultaneous Upwards & Downward compression + Parallel Compression mixing + Mid Side Panning + Mono Maker + Stereo Widener + Individual Band Anti Pop Bypass + Individual Band Isolation Mode + Preset Manager with new preset scrub through feature home page


Wednesday 21 February 2018

Wavetable - Ableton Live 10 Instrument


Many wavetable synths out there such as 'Serum' etc but lives is a particularly nice one with full screen graphics and complemented by a much easier to use interface. I found myself diving deeper here than in others.No integration as yet to import your own waveforms but that is probably on the horizon.

Thursday 15 February 2018

Echo - Ableton Live 10 Device


'Echo' is such a formidibal sounding tape delay/echo device it deserves a place here all of its own,even though it's only available in 'Live'

If you’re a fan of old-school tape delays like we are, you’re definitely going to enjoy messing around with Echo. As you’ll see in our accompanying video, there are a lot of options to twiddle.

We particularly like its raging feedback; the strange metallic and tonal effects you can achieve with short delay times; and you can also use Echo as a pseudo ‘retroiser’ using its Noise section. It might not replace your favourite third-party delay plugin, but it’s definitely useful to have as a bundled device inside Live.

We leave no stone unturned in this huge walkthrough on Echo.
Step 1: Let’s take Ableton Live 10’s new Echo device for a spin. Live’s other onboard delay devices are rather utilitarian – except for Grain Delay, which is especially ‘out there’) – so it’s nice to see a substantial new delay to rival third-party options. Seeing as the device is a creative dub-style echo effect, we’ll load a new instance over a dry reggae ‘skank’ sound.
Step 2: Like any delay plugin, Echo’s Dry/Wet governs the balance of dry signal to delayed signal. We’ll keep that at around 50%. Up in Echo’s top left, you’ve got separate Left and Right controls to set delay time for the left and right channels. Sweep these around for tape-style repitching effects as the echoes spring to their new values.

Step 3: Left and Right times are locked together by default, but you can decouple them by detoggling the yellow Link button that sits between. Both Left and Right times are synced to host tempo – detoggle one of the Sync buttons if you want to set delay time in milliseconds.
Step 4: Below the Sync buttons sit dropdown menus, where you click and choose one of four beat-synced modes. Under that, increase or decrease values in the boxes to offset either delay earlier or later by a few milliseconds. This is useful if the Left and Right delays are set to identical speeds, as you can create width. These work independently even when the delay times are locked.
Step 5: As you’d expect, you can crank up the Feedback knob to feed the delay outputs back into the inputs for more and more repeats. After the dial is pushed past around the 12 o’clock point, the feedback starts to self-oscillate, for those wild dub-style delay effects. This is definitely a fun, tweaker’s delay!
Step 6: Next, we’ll back down the Output and crank up the Input, which will distort the delay signal. Toggling the D button causes the input gain to also distort the dry signal – set the Dry/Wet to 0% to hear this more clearly. The Polarity button inverts the feedback’s polarity, and noticeably changes the delay’s character, especially with short delay settings.
Step 7: In true Space Echo style, there’s also a simple Reverb onboard. Mix it in with the Reverb knob, and shape its length with the Decay slider. With the dropdown underneath, you can select where the reverb is placed in the signal path – Pre, Post or Feedback, with the latter getting pretty wild when settings are pushed.
Step 8: Flanking the reverb is a Stereo knob. Setting it to 0% monos the wet signal, 100% leaves the original width, and 200% gives maximum widening. Under that are three delay modes: there’s the default Stereo mode; Ping Pong is left-to-right as expected; and there’s a Mid/Side mode – when selected, the Left time becomes Mid, and the Right becomes Side.
Step 9: At the bottom of Echo’s black centre section are controls for shaping the tone of the delay repeats with resonant high- and low-pass filters. HP and LP controls set the frequency of either filter, with Res boosting a peak around that frequency. Click the small arrow to pop out the filter display, where you can drag the filter nodes for more intuitive tweaking.
Step 10: Now to the Modulation tab, where you can modulate delay time and filter frequency with an LFO. The yellow and blue lines represent LFO shape for the left and right channels – click an icon to choose one of six LFO waves – and the relationship of these lines represents phase between L and R, altered with the Phase amount below.
Step 11: Sync switches modulation between clocked and free-running. Increase or decrease Mod > Delay to apply LFO modulation to the delay time and wobble pitch. Use Mod > Filter to modulate cutoff. Set the LFO’s Rate amount or punch the x4 toggle to scale that up by a factor of four. Push up Env to blend the LFO modulation with an envelope follower – 100% is envelope follower only.
Step 12: Over in the Character section, you can alter the delay’s dynamics and flavour. Ducking does exactly as the name implies: it pulls down the wet signal when the input is triggered, a bit like sidechain compression. Pulling down the Threshold induces gain reduction, and Release sets how long it takes before the wet signal comes back up again. Time this with your song’s tempo for groovy pumping effects.
Step 13: Gate cuts any input signal below its Threshold value. Noise dials in grunge and fizz to simulate a noisy analogue delay – you can Morph between different types of noise. Wobble randomly wiggles delay time, and its Morph control sweeps between different mod types. The Repitch button at the bottom prevents the delays from changing pitch when delay times are altered.
Step 14: Just like with Wavetable, Echo’s visual feedback is particularly useful. Ableton call this centre dome-like display the Echo Tunnel: circular lines represent the repeats, the distance between lines is Time, and the density shows you Feedback.Review from Musicradar

Friday 9 February 2018

Ableton Live 10.0.1


This  super major update gives Live a new lease of life and the Push 2 controller too. Better graphics and smoother workflow are now much better integrated and there's a plethora of small enhancements. The new 'ECHO' audio effect is just brilliant, reminding me of the Waves H-Delay ,but this thing can do so much more! The new instrument  'WAVETABLE' is a very advanced synth with many sonic capabilities under it's hood. In my opinion the best just got better!


Create bolder sounds with Live’s new devices. Stay in the flow with a multitude of workflow improvements. Do even more away from the computer with Push. Build your sound with a curated library. And get the unlimited potential of Max for Live, seamlessly built in.

Create with new devices
Meet Wavetable, Echo, Drum Buss and Pedal: new devices that mean colorful new sounds are possible with Live’s instruments and effects.

Wavetable
Immediately playable, infinitely capable, Wavetable is a new synthesizer built by Ableton. Shape, stretch and morph sounds using wavetables derived from analog synths, and a range of other instruments and sounds. Start sculpting sounds right away—even without a deep knowledge of synthesis—or explore its rich palette and potential through an intuitive interface.

Echo
Echo brings together the sound of classic analog and digital hardware delays in a single device—your new go-to delay. Drive and shape sounds with its analog-modeled filters, turn up the noise and wobble for vintage imperfections, or add modulation and reverb to create diffuse soundscapes, wailing feedback and more.

Drum Buss
Drum Buss is a one-stop workstation for drums, capable of adding subtle character or bending and breaking drums to your will. Add warmth and distortion with drive and crunch, take control of dynamics with compression and transient shaping, dial in and tune boom and control bass decay with the dedicated low end section.

Pedal
With separate circuit-level models of overdrive, distortion and fuzz guitar pedals, Pedal brings the character of analog stomp boxes to Live. The effect goes all the way from subtle to reckless—it excels at warming up vocals and other instruments, driving synth sounds or completely smashing drums. And of course, it sounds great with guitars.

Stay in the flow
You’ll find improvements to Live that help you stay in the flow at every stage of your creative process, whether you’re getting ideas down, organizing your setup or editing the details of your music.

Do even more from Push
Live 10 brings new functionality and new high-res visualizations to Push. Now you’ll spend even less time with the computer—whether you’re composing ideas, editing MIDI or shaping and mixing sounds.

New melodic step sequencing layout
Simultaneously sequence notes and play them in from the same pad layout – the bottom half of the layout allows you to play notes in real time while the top half lets you sequence them.

Advanced Device visualization

See Wavetable or Echo in rich detail on Push as you play. When mixing, you’ll see spectrum analysis on EQ Eight, as well as advanced Mid/Side and Left/Right EQ modes. Get real-time audio visualizations from Live's Compressor: see threshold settings and compressor activity, plus set up sidechain routing.

MIDI note view
Navigate and refine the notes of your pattern in context directly on the Push display. Press and hold a step in your sequence to zoom in and use the on-screen control to adjust velocity, note position and length.

New library of sound
With new collections of Packs, Live 10 has more sounds that are ready for finished music, right out of the box. They’re set up for tweaking to your needs or taking in different directions. Plus the library has been reorganized to make it easier to find what you’re looking for.


Thursday 1 February 2018

Noiiz - Plugin


'Noiize' is a relatively new website and a one of a kind too. Featuring there plugin which gives one access to drag and drop samples/loops from a variety of  packs right into your own DAW. A unique and very innovative idea which previousy required a paid for membership to be able to do this. Now though it is available FREE with a few limitations. Since i am a member and was asked to invite my friends i would like to share this with anyone out there who is interested. By the way there is also a free 1GB storage space to upload your own samples. For the FREE invite to join' Noiize' go to http://alturl.com/u3zva

Working with a team of musicians and sound designers to create fresh and unique sounding content across 40 genres, UK based Samplephonics have produced well received royalty free sample packs since being founded by former producer and mastering engineer Davis Rose in 2011.

With subscription plans increasingly becoming the norm within the world of Pro Audio and professional software tools in general, what can Samplephonics spin off service Noiiz bring to the table for the cloud generation ?

There a three elements to Noiiz which are loops, one-shot sounds and preset patches for ES2 – FM8 – Massive & Sylenth. The best way to experience Noiiz is to download the VSTi available for Windows or Mac for once you have set up an account. Alternatively you down browse for sounds via website and download them from there.

The site says there’s over $10k’s worth of content available to it’s subscribers but it doesn’t say how many loops or samples this amounts to but it’s a lot and with more arriving on a regular basis from various contributors it’s hard to see how one person could ever exhaust it all.

The first port of call upon inserting the plugin or opening up and logging in to the website is your “feed”. This is a list of the latest pack releases and seems to have something new appear every week. You can browse the samples packs in the feed or if you’re looking for something more specific click the “Sounds” menu.

The sounds menu has a list of Sample Packs complete with cover art that you can browse explore as well as play-lists. You can also organize any content that you discover by tagging favorites or adding individual samples to a folder for i.e. for each project you are working on. Any previously downloaded samples are also accessible here to grab again should you need to.

There’s a broad search box that you can type a keyword into to start looking for samples or you can go to an advanced search page where many more parameters can be entered.

For me the advanced search is where Noiiz comes into it’s own. You can search by genre which covers Acoustic, Ambient, Bass, Disco, Drum & Bass, Dubstep, EDM, Electro, Electronic, Electronica, Experimental, Film, Funk, FutureBass, Hip Hop, House, Jazz, Melodic EDM, Pop, Reggae, RnB, Rock, Soul, Sound Effects, Techno, Trance, Trap, Tropical House and World.

You can also search by instrument, creator, tempo range and whether you want a loop or a one shot. One of the best search features for me is the ability to set which key(s) you would like the sample to be in. Although the plugin can actually pitch shift it for you and most DAWs come with this feature I like having the option to preserve the audio fidelity of the sample by keeping it’s original key if possible.

Once you have a list of samples that fall within your search parameters comes the fun part of auditioning the results. You can sort the search results by various methods, Random, Date Added, Popularity, A-Z by name, Tempo, Key, Instrument, or Pack. Depending on how broad or narrow your search criteria was you can have hundreds of results or just a handful to go through.

With the website you can play , loop, add to favorites download or share them via twitter, Facebook, email or create link. In addition the plugin version brings some DAW integration to the party which allows you to match sample playback to your project tempo and have the chosen sample previewed alongside your track at the right speed. Although this feature has been available within my own DAW of choice (Sonar) for many years for previewing samples already on my hard drive it’s pretty cool to be able to do this with cloud hosted previews when there are so many to choose from.

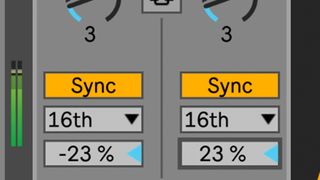
You can also pitch shift them up and down if you wish independent of the tempo and then once your happy it’s a small matter of dragging and dropping the sample from the plugin into your DAW where it creates a new audio track containing the sample complete with any tempo or key changes.

Now I live in the middle of nowhere so we don’t get anywhere near the broadband speed of them city living folks so there are a few times when jumping between samples takes a little longer than my impatient fingers would like. I don’t whether it’s my kids playing their online games, or the Noiiz servers that have a bit of a lag. Sometimes it’s snappy as I could wish for but other times I might be clicking my heels for 10 or 15 seconds whilst it catches up with me. I figure this is still much quicker than trawling my own drives for that perfect Trap snare or percussion loop.

All samples are royalty free and yours to keep forever even if you no longer subscribe. The cost of accessing the abundance of material here is a very reasonable $9.99 per month or $100 per year. Personally I think this is great value for money if you use samples within your work on a regular basis.

Writing consistent high quality music for Libraries is hard work and anything that can lighten the load, help inspire new directions or get you out a creative rut is worth it’s weight in gold.

The time saving alone in being able to find what you want when you want it and not spend hours every month trying to remember where heard that kick drum sample that’s perfect for your latest track let alone which folder it’s in is worth the admission price. Never needing to go buy one off sample packs again is incredibly appealing and in my first few months of using the service I’ve been able to use it as a springboard into new genres that have opened more doors for me as a composer. Review from MusicLibraryReport